Circles and Ovals
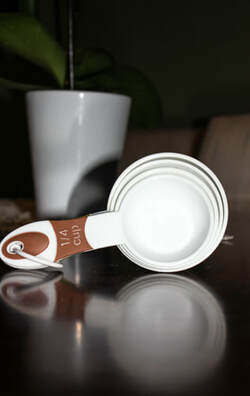
For this photo I put all of the measuring cups together and flipped the camera so it was more portrait mode. My intention was to leave enough space under so that the reflection of the cups was noticeable since I thought it really brought the photo together and was a natural effect. During the editing process I brightened the image and used the spot tool in lightroom to take away little marks that were bothering me.
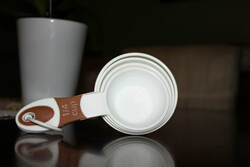
Taking a different approach on the measuring cups, I flipped the camera more of a landscape mode, but still leaving in the reflection since I really liked that aspect. The editing process for this one was very similar to the one above, however I didn't brighten this picture as much since I thought where it was at was good. Also, I also went in with the spot tool again to fix marks I didn't notice while I was taking the pictures.
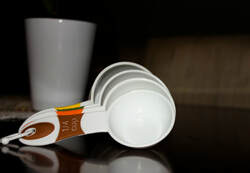
In my final picture for circles and ovals I split up the measuring cups so that each individual one was seen. I loved how it turned out since the cups get smaller and smaller which I found very satisfying when they are lined up. During the editing process, I darkened up the background and made it blurry, so that the cups were really what was in focus. I used the spot tool to fix little marks and brightened the whites in the photo.
Patterns
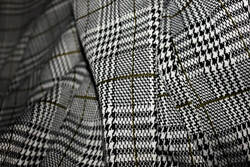
For this weekends shooting assignment we had to photograph patterns. My first pattern is this white, black and yellow jacket. I folded the jacket a bit to mix up the pattern a bit. I also took the time to focus the camera on the front piece of the jacket, as you can see the back and farther parts are blurry. I really liked how it turned out after I made the whites and blacks more vibrant and added some more contrast. The more you look at it, it seems to almost play with your eyes.
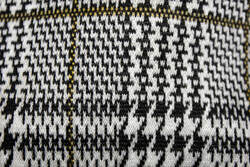
My second photo for this week is the same jacket but more close up since I really liked the pattern. I edited the image the same way since I really liked the effect it had on the other picture. Furthermore, I use the whitening tool and drew over all the white parts so that they catch your eye. As a little extra, to finish I used the spot tool and went over some little strands that were sticking out.
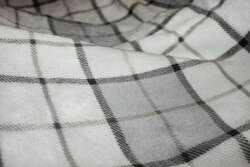
For my last photo of this weeks assignment I found a different pattern, my blanket. I positioned it in a way that the bigger and front piece was the focus, and the layers at the back slowly faded out. To edit this photo, I used the dropper tool and selected a light grey to find a correct tone. I then went over the whites with a whitening brush to make more sections pop. There was also a strand of hair in the original picture so I used the spot tool in order to get rid of it. In conclusion, I boosted the contrast and darkened some of the blacks in the blanket lines.
Glasses and Cups
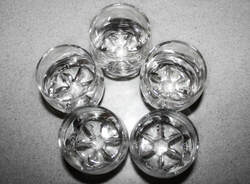
For this picture I lined up 5 glasses cups in a star-like shape to create a satisfying effect. I took the picture from a birds eye view to really capture every aspect of the shape of my glasses. When I edited this photo I used the eye dropper in a light grey section to create a nice overall colour. I then took the blacks a bit down and make the whites whiter. I raised the contrast so that each part was well identified and easy to recognize since all the glasses go beautifully together.
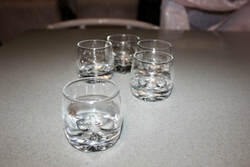
Using the same glasses as the previous picture, I took one of the 5 out of the star pattern and placed it in front. I then decided to focus on the glass in front and leave the 4 others in the back a bit blurry. To edit this picture I used the light grey to change the overall colour and tone of my photo. I then turned up the contrast a bit, brightened the whites, and darkened the blacks.
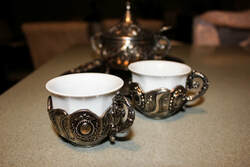
For my final photo I used 2 tea cups. I placed the whole set in the back, and the 2 cups one in front of the other directly in the middle of the photo. During my editing process I used the spot tool so fix marks that were on the cups, and little stains the camera picked up from on the table. I blurred out the background more and focused on the main idea, the two cups. I brightened the photo by increasing the white and I found that it really changed the whole look from dull to vibrant.
Shoes
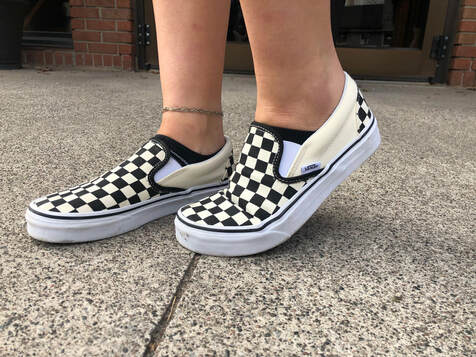
I went to one of my best friends birthday dinner this weekend. I was looking for some nice shoes to photograph since I thought it was the perfect opportunity to snap some photos. I found one of my friends checkered vans that I could easily picture in an advertisement. To edit this photo I used the dropper tool to find a grey and change the tone, then I went straight to the spot tool in order to fix stains and marks found on the ground and shoes. Overall there were no big changes to the picture since I liked the original look.
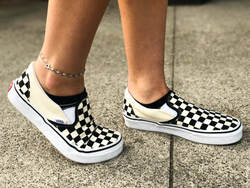
My second photo of this assignment is by far my favorite. The quality turned out very good and the positioning of her feet makes it look nice and come together. To edit this picture I turned up the saturation, this is why she looks more tan. I used the spot tool to fix marks and turned my whites brighter. In conclusion, everything about the photo I personally like and I even decided to use it for my shoe advertisement that you can find in the "photoshop" section of my website. :)
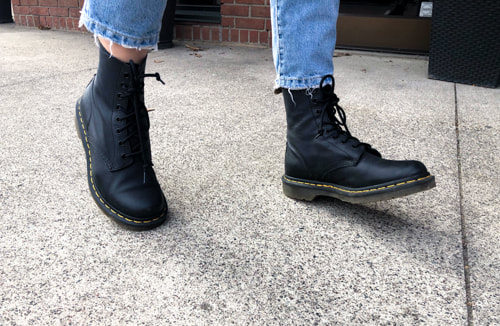
My last picture of shoes is very different compared to the others. I changed to photographing some black boots. Out of all the boot pictures I liked this one the best. Especially because of the pose. I find it very fun and happy, like it's a nice stroll walking downtown. To edit this photo I used the dropper tool to make all the colours work well together. I also turned the brightness up since the feel I got from the image is more vibrant and happy. To conclude, I used the spot tool to fix a lot of the dirty markings in the side walk, and little scratches found on the boots.
Person for ad
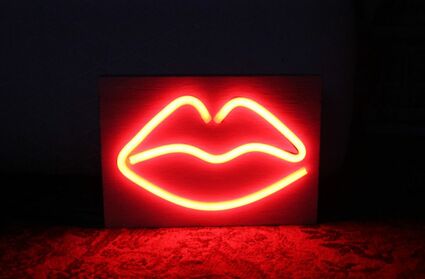
I chose to take a picture of this neon red light since it is a very good representation of her aesthetic. She loves red and this is actually a piece from her room. While editing this sign, I darkened the back so that the attention is really focused on the sign and not stuff around it. I also turned the contrast up so it became even more visible.
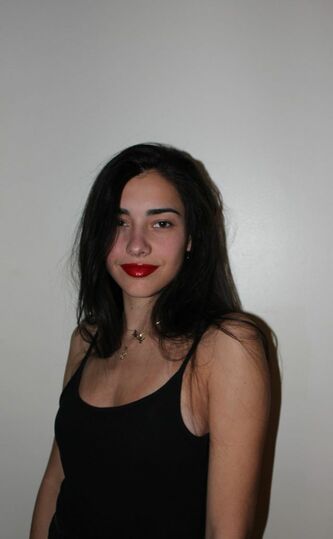
This is one of the photos I took of my sister. She is wearing all black since that is one of the only colours she wears, and has a pop of red to accent the neon sign, by wearing lipstick. During my process of editing, I found there wasn't much I wanted to change and I actually liked how the original picture turned out. However I still changed a couple things like; using the dropper tool to create a nice tone, cropping the image so the only part of the wall visible is the white, and making the whites in the picture brighter.
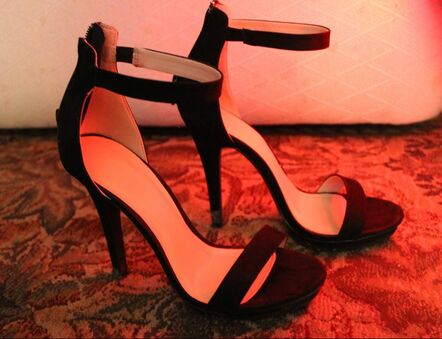
My final image is these black strap heels. My sister always wears them and they turn out well on camera. My theme for this weekends shooting assignment was mostly red, so I took the red neon sign from my previous photo, and hovered it above the shoes to add a red light effect naturally above the heels. When it came time to edit, I only cropped the image a bit, turned the brightness up a tad, and used the spot tool to fix up some little details.
